How to Create a Linked List of Tables
Using the more advanced features of Microsoft Word, such as the References tab and caption or cross-reference functions, can seem a bit daunting, especially for those who have never had to create an automated, linked list before. However, creating a linked List of Tables at the beginning of your dissertation document will provide increased ease-of-use and functionality. Most universities require a List of Tables at the beginning of the dissertation, because this function allows readers to Ctrl + Click on a Table in the list and be automatically directed to that table in the text. In addition, if the writer needs to add a table or update the page numbering, it can be as simple as a right click!
The first step to inserting a linked List of Tables is to go to the first table in the document. Next, copy the title of the table to your clipboard, and then select the table and its contents (not the title, just the table). Then, go to the References tab at the top of the Word document and under the Captions section, click on the Insert Caption button. Figure 1 displays this selection.
Need assistance with your project? Leverage our 30+ years of experience and low-cost service to make progress on your results!
Schedule now using the calendar below.
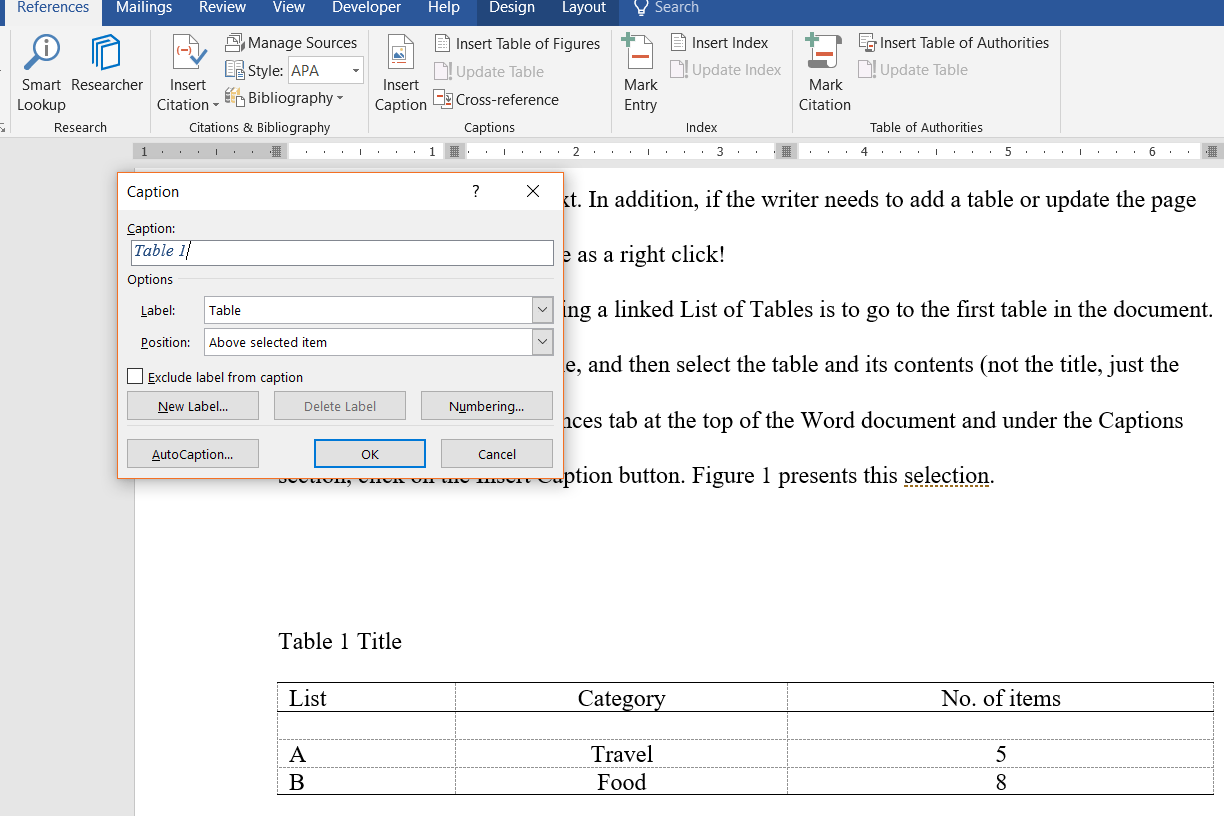
Figure 1. Insert a caption on a table.
In the Captions box that appears, type or paste the title of the table after the word Table and then click OK. A new Table and Title will be inserted above the table (see Figure 2).
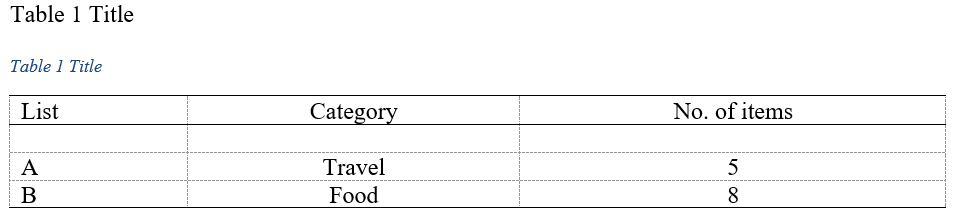
Figure 2. New table title inserted.
Next, you will need to modify the caption text so that it matches your university or style guide requirements. Following APA, this should be Times New Roman 12, double spaced, black font. To modify the caption, go to the Home tab at the top of the Word document. Under the Styles menu, at the far right, click on the drop-down arrow to select Apply Styles… (see Figure 3). You can also open the Apply Styles menu by pressing Ctrl + Shift + S on the keyboard. A styles menu should appear on the screen, usually to the left.

Figure 3. Styles menu drop-down, located under the Home tab.
Next, place the mouse cursor in the table title caption, and the Style Name “Caption” should appear in the Apply Styles menu. Click on the Modify… button and select the appropriate formatting for the caption. Figure 4 presents an example of this. After you have adjusted the font style formatting, select OK. From this point forward, every time that you insert a new table title or caption. Then, it will automatically format correctly to how you modified the Caption style.
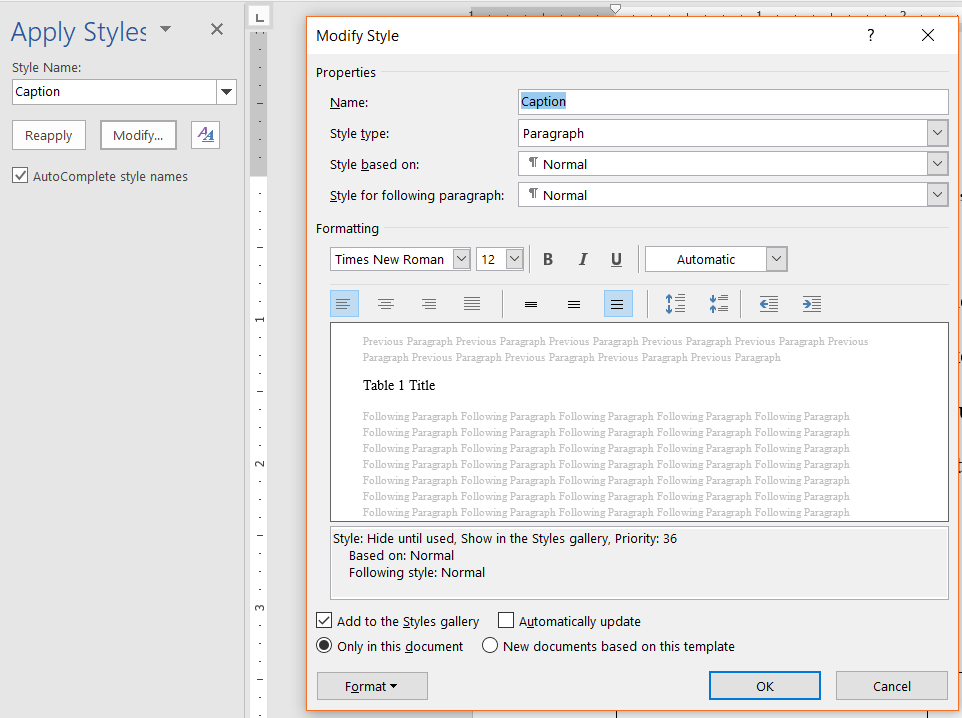
Figure 4. Menu to modify the caption style.
Now that the laborious part of modifying the caption style is complete, simply continue inserting captions to all subsequent tables in the text. You will repeat the process from the beginning: copy the table title, select the table, click on the Insert Caption button under the References tab, and then paste or type the title of the table and click OK. Make sure to delete any old table numbers or titles, as the Insert Caption feature creates a new one.
After all table titles have been linked and inserted with the Caption style, return to the preliminary page in your document where you would like to insert the automated List of Tables. Next, go to the References tab and this time select the Insert Table of Figures button (see Figure 5).
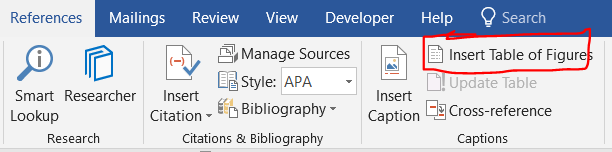
Figure 5. Insert Table of Figures option under the References tab.
Before selecting OK, you can also click on the Modify button and change the formatting of the List of Tables, if needed, to comply with your university guideline requirements. After selecting OK, the List should appear similar to the following:

To update the List of Tables, you can simply right click on the list. Select Update Field, and then choose either Update page numbers only OR Update entire table. The only reason you would need to update the entire table is if you altered any part of a table title. For example, capitalization of a word or if you added (and linked with a caption!) a new table. Microsoft Word will automatically repopulate the page numbers and table information for you.
This step-by-step tutorial provided the basic explanations of how to link tables in a document with a caption style. Also with a automatically insert and populate a List of Tables. Following these steps will alleviate the time spent trying to manually create a List of Tables. This will also allow readers to quickly navigate the document to view tables in the text.