Microsoft Word Proofing Options: How to Make Word Automatically Find Errors
Taking advantage of Microsoft Word’s proofing and editing options can help you maintain a scholarly level of writing and complete the dissertation process more quickly. For many writers, it is hard to focus on the minute details, including spacing between sentences and whether the use of affect or effect is correct. With so much emphasis on the content and making sure one’s ideas and findings come across clearly, the meticulous details often fall by the wayside. However, Microsoft Word has various built-in features to help combat formatting and grammatical errors. Through this blog, I specifically reference features in Word 2016, but many of these features are available and similarly labelled in earlier versions.

Discover How We Assist to Edit Your Dissertation Chapters
Aligning theoretical framework, gathering articles, synthesizing gaps, articulating a clear methodology and data plan, and writing about the theoretical and practical implications of your research are part of our comprehensive dissertation editing services.
- Bring dissertation editing expertise to chapters 1-5 in timely manner.
- Track all changes, then work with you to bring about scholarly writing.
- Ongoing support to address committee feedback, reducing revisions.
The first step to turning on the proofing and editing features is knowing how to access these options. The quickest way to access this is to go File à Options (should be at the bottom of the File drop-down). After selecting Options, a more in-depth panel should appear that includes a new list of options to choose from (see Figure 1). The Proofing option should appear on the left; in Word 2016, this option is the third down from the top.
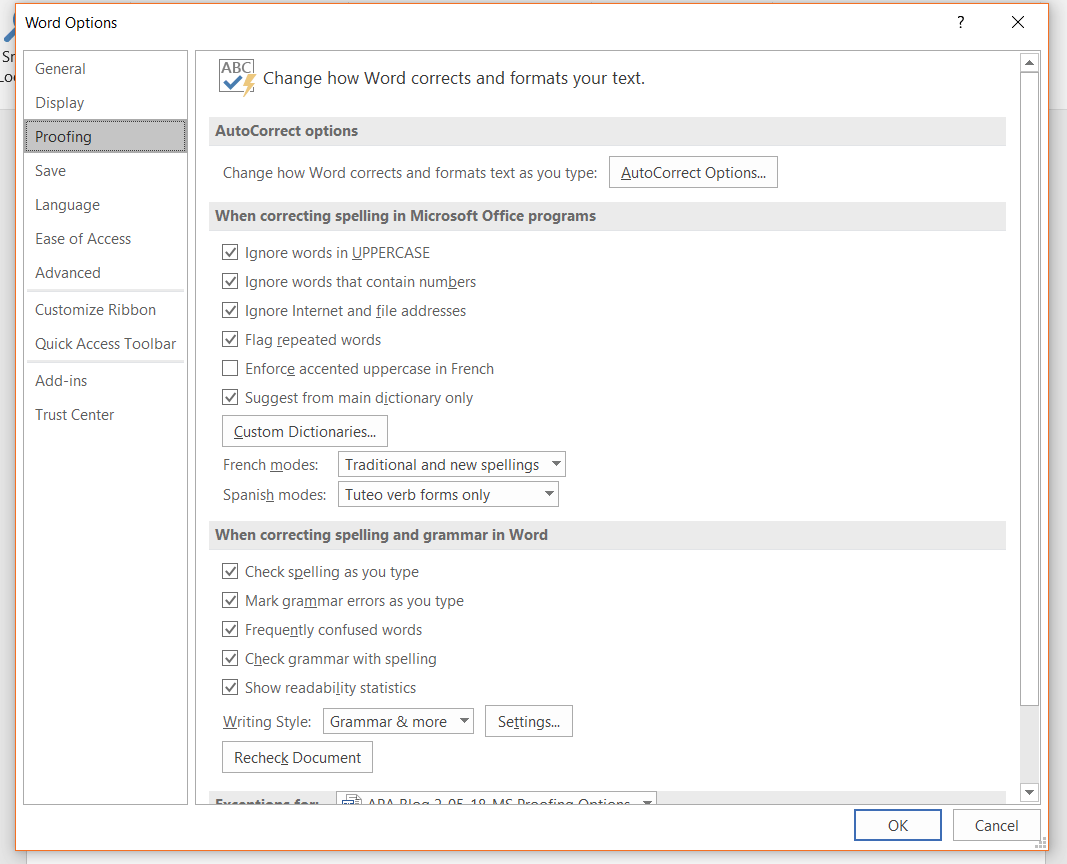
Figure 1. Word Options panel.
Within the Proofing tab, there are various formatting choices that one can make, depending on school and formatting guideline requirements. If following APA style, make sure that the Dictionary is set to English (United States). To check this, click on the Custom Dictionaries… button and under the Dictionary language drop-down and select English (United States). This will ensure that Microsoft Word is checking the proper spelling of words throughout the entire document.
As shown in Figure 1, it is best to select all of the options in the section titled When correcting spelling and grammar in Word, such as Check spelling as you type. This will help limit spelling errors while writing, instead of conducting one long spell-check at the end of the document—which can be daunting when the document contains more than 100 pages of text! At the bottom of this same section, there is a drop-down menu to the right of Writing Style. At this drop-down menu, make sure Grammar & Style is selected (you want to check both, not just grammar). To the right of this drop-down, there is a button titled Settings… This option is very important to choosing the basic style or formatting elements required by APA or the university style guide.
Under Settings. . . it is generally best to select all options and then decide whether you agree or not when Microsoft Word flags them throughout the document (see Figure 2). For example, you may not care about Date Formatting, but do want to check for the use of Comma Missing after Introductory Phrase (which is an APA requirement, e.g., According to Author,).

Figure 2. Grammar settings in Microsoft Word 2016.
Make sure to scroll through and read the options, as you may be surprised to learn the lengthy list of grammar and style elements that Microsoft Word will automatically change or highlight as errors. At the bottom of the Options, there is a section titled Punctuations Conventions. Per APA, make sure the Oxford Comma box is selected, the Punctuation Required With Quotes is set at inside, and the Space Between Sentences is set at one space OR two spaces (see Figure 3). APA prefers two spaces between sentences; however, most university guidelines require one space between sentences. Either way, it is best to keep this formatting consistent throughout and selecting this feature will ensure that Microsoft Word underlines any spacing between sentences that do not meet this requirement. Select OK when you have finished reviewing and choosing the options.
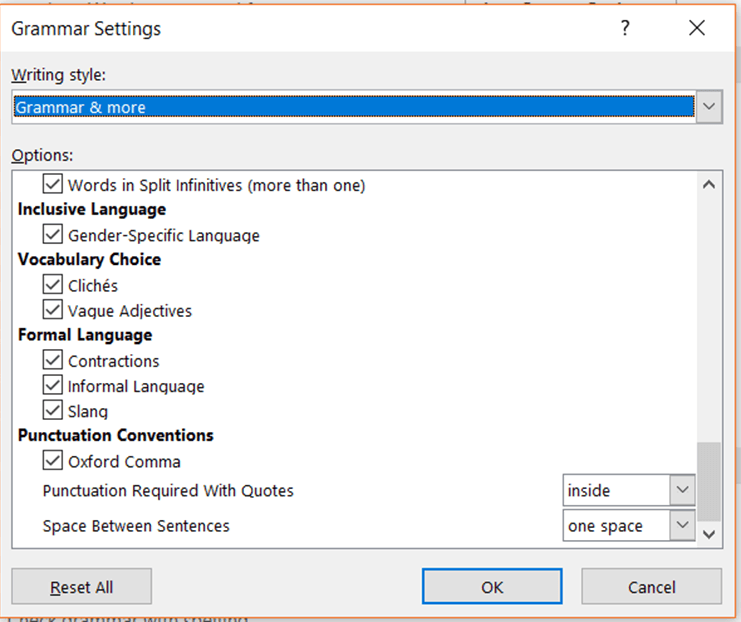
Figure 3. Grammar settings continued.
As a final step, and to verify that you have applied these settings to the document you are working in, select the Recheck Document button (see bottom of Figure 1) and then choose Yes when presented with a prompt. Before closing out of the Word Options box, Proofing settings, verify that the Hide spelling errors in this document only and Hide grammar errors in this document only options are NOT selected. Having either of the boxes checked will essentially turn off Microsoft Word’s spelling and grammar check features.
I hope this blog has been helpful and informative! Knowing how to turn on and navigate these basic grammar and formatting features will help speed up the editing process and decrease the number of errors that may hold back your dissertation from advancing toward publication.